Showing posts with label Etsy. Show all posts

Mar 14, 2014

Diy muslin swaddled prints with a Snorlax

I swear, this is going to be the last one.  I think we've painted and exacto-knifed ourselves out for a while.  I bought a remnant of the muslin that was just too big for a little baby.  So we chopped it in half.  

One for buffalo (post) and one for ..............

Wait for it...........

the Snorlax!!  


For those of you who don't know, a Snorlax is a Pokemon.  Who, is adorable, and if anyone wants to make me one of these, I'd let you, for free even.   (The husband claims that anyone who is younger the 35 probably knows what a Snorlax is.  Interesting stat I think)

The last few months, the husband has been making me watch these classic Anime videos...which some were good, but some were not.  But, how could I forget, that I myself, is/was a slight anime nerd.  I'd forgotten that in high school I would watch Pokemon.  I don't know why, I just liked it, a lot.  The husband has recently informed me that it actually was a game.  I had no idea.  I just liked to watch the cartoons, which, in case you were wondering, have recently been added to Netflix!

Anyways, Hannah and I were brainstorming and we came across said Snorlax.  He could be adorable on a boys blanket right, yes, yes he could and is.  He was a little harder to find an image for.  I actually found a video clip that had him in just the right position and did a Print Screen Shot on the computer.  Then we printed him out and started cutting him out.  Once again, I started the cutting, but Hannah finished it out. 


After testing him out on some cardboard we were ready! We centered him on the blanket and started painting. 


 After getting him applied, we started on the "Zzzzz."  I don't know why, but the Snorlax is always sleeping.  ALWAYS. 


I think he turned out pretty dang cute.  Plus, I've never seen another one like it, which is always a bonus in my mind.


Thanks to Hannah for helping all my muslin swaddling cloth dreams come true!  I probably never would have done it (or watched her do it) if she weren't around!

I posted these before, but here are some tips and instructions on stenciling. 


Some tips that I learned from Hannah on Stenciling. 

1.  Make sure your exacto-knife is sharp and your eyes are even sharper.  You may want to print a few of your patterns so if you mess up one by cutting something wrong.  Hannah even colors one ahead of time just to make sure she knows what she does and doesn't want to cut out. 
2.  When printing on the stencil paper there will only be faint lines.  Make sure to print on some scrap after running the stencil paper through to get all the left over ink that didn't print. Otherwise, you'll go to print something and it will be covered with random lines of buffalo. 


3.  Always cut your stencil out on some surface you don't mind cutting up. 
4.  Always test your stencil on something else before diving into your material.
5.  We like to tape our stencils to the cloth.
6.  Always dab off excess paint before applying to cloth. 
7.  Hold the stencil with one hand to keep it steady.  You'll want to dab your paint brush STRAIGHT up and down to avoid bleeding underneath.
8.  Once you'd applied your paint, pull stencil immediately after. 
9.  You'll want to make sure you didn't get any excess paint on the back of the stencil before laying it down again on your surface.  
10. If you are going to use a stencil multiple times, make sure to stop and let it dry after 10 times or so, depending on the details.  It may be more or less times you can use it, but you'll start to notice it sagging and just not coming out quite as sharp.  I've actually found that after the paint dries it's basically been plasticized and works really well after. 
11. Stand back and be amazed.  You did it. Yes, you are awesome and so is that stencil.  


Here are the basic utensils we used for stenciling. 

Hannah prefers the shorter style paint.  She also really likes her fat stubby paintbrush. (green one.) We used the standard sponge brush on the bison and the short sponge brush.  We use the fine paint brushes on really small detailed work, like on the tiny little "z."  Also, this is her beloved paint tray. 

Mar 13, 2014

Bye son, Bison, DIY Stenciled Onesies and DIY Baby BisonSwaddlerBlankets.


Let us start out with a joke by the husband.  
Husband: "Why did you decide to use the Bison?"  
Me: "I don't know, it spoke to me."
Husband: "Is it because you wanted to be able to say "Bye son"."
Me: I usually don't respond to his jokes anymore.

To continue on with little brother's blankets, I decided to try something a little beyond my skills.  It had to do with a Bison, excato-knife, potato, and scissors.  Supposedly, you make stamps with potatoes.  I saw them here.  Which, I'm sure you can, just not with the particular design I chose.  My start to finish lasted about 4 minutes and in disaster.  It didn't even go far enough to even show you.  I gave up after my paper started shriveling up from the potato. 


Then, my sister Hannah took over.  As much as she claims that she is not a crafty person, she really is.  It's just the perfectionist in her that stops her  She made Aiko a few onesies, that she stenciled and painted herself.  They turned out awesome here.  Hannah and her OCD self probably couldn't bear to watch me muff it up again. 

We pulled out our stencil paper, resized and printed our buffalo (by we I mean she.) and started cutting.  Make sure to have some kind of surface under the stencil paper so you don't cut up your table. 


She's pretty good right?  We did have to delete some of the buffalo, there were just too many little lines.  After we tested out the stencil, she applied it to the onesie!

Print purchased from Etsy Shop PrintitFrameit


I know, I know, it's pretty rad.  If only I could have a crafting-slave-perfectionist who I just bossed around and said "good job" to after they finish.  But don't worry, eventually I did join the bison-exacto-cutting-fun.  See, I had some other big plans for this bison.  We did one successfully, WHY NOT MILLIONS?!


Well, how about five. We printed up four more bison and I myself, even cut out two of them.  It's kind of a long process, but once you have the stencil you can use it quite a few times. 


By quite a few times, I mean a lot.  (I'll put some tips at the end of this post.) We decided to apply it to another Swaddler Blanket.


Boy, am I glad we did.  I was a little worried that all the detail would get lost on the texture of the muslin, but it worked out great!  We did mainly yellow buffalo with a few random blue ones.   


After finishing with the buffalo we realized we needed a little something more.  So I took a chapstick and placed dots.


I was too lazy to pull out my good camera, plus I don't really know how to use it beyond Auto anyway...so you have some different colored photos going on here.


What do you think?  Pretty cool right?  And really, it's not that hard, I promise.  It take some time, but once you have your stencil you can use it over and over again.  

Some tips that I learned from Hannah on Stenciling. 

1.  Make sure your exacto-knife is sharp and your eyes are even sharper.  You may want to print a few of your patterns so if you mess up one by cutting something wrong.  Hannah even colors one ahead of time just to make sure she knows what she does and doesn't want to cut out. 
2.  When printing on the stencil paper there will only be faint lines.  Make sure to print on some scrap after running the stencil paper through to get all the left over ink that didn't print. Otherwise, you'll go to print something and it will be covered with random lines of buffalo. 

3.  Always cut your stencil out on some surface you don't mind cutting up. 
4.  Always test your stencil on something else before diving into your material.
5.  We like to tape our stencils to the cloth.
6.  Always dab off excess paint before appliying to cloth. 
7.  Hold the stencil with one hand to keep it steady.  You'll want to dab your paint brush STRAIGHT up and down to avoid bleeding underneath.
8.  Once you'd applied your paint, pull stencil immediately after. 
9.  You'll want to make sure you didn't get any excess paint on the back of the stencil before laying it down again on your surface.  
10. Stand back and be amazed.  You did it. Yes, you are awesome and so is that stencil.  


Here are the basic utensils we used for stenciling. 

Hannah prefers the shorter style paint.  She also really likes her fat stubby paintbrush. (green one.) We used the standard sponge brush on the bison and the short sponge brush.  We use the fine paint brushes on really small detailed work, like on the tiny little "z."  Also, this is her beloved paint tray.


Bison Print purchased from Etsy Shop PrintitFrameit.

Mar 3, 2014

Etsy Shop.


Just added some new items to my Etsy Shop Membil!  I really like how my skulls turned out.


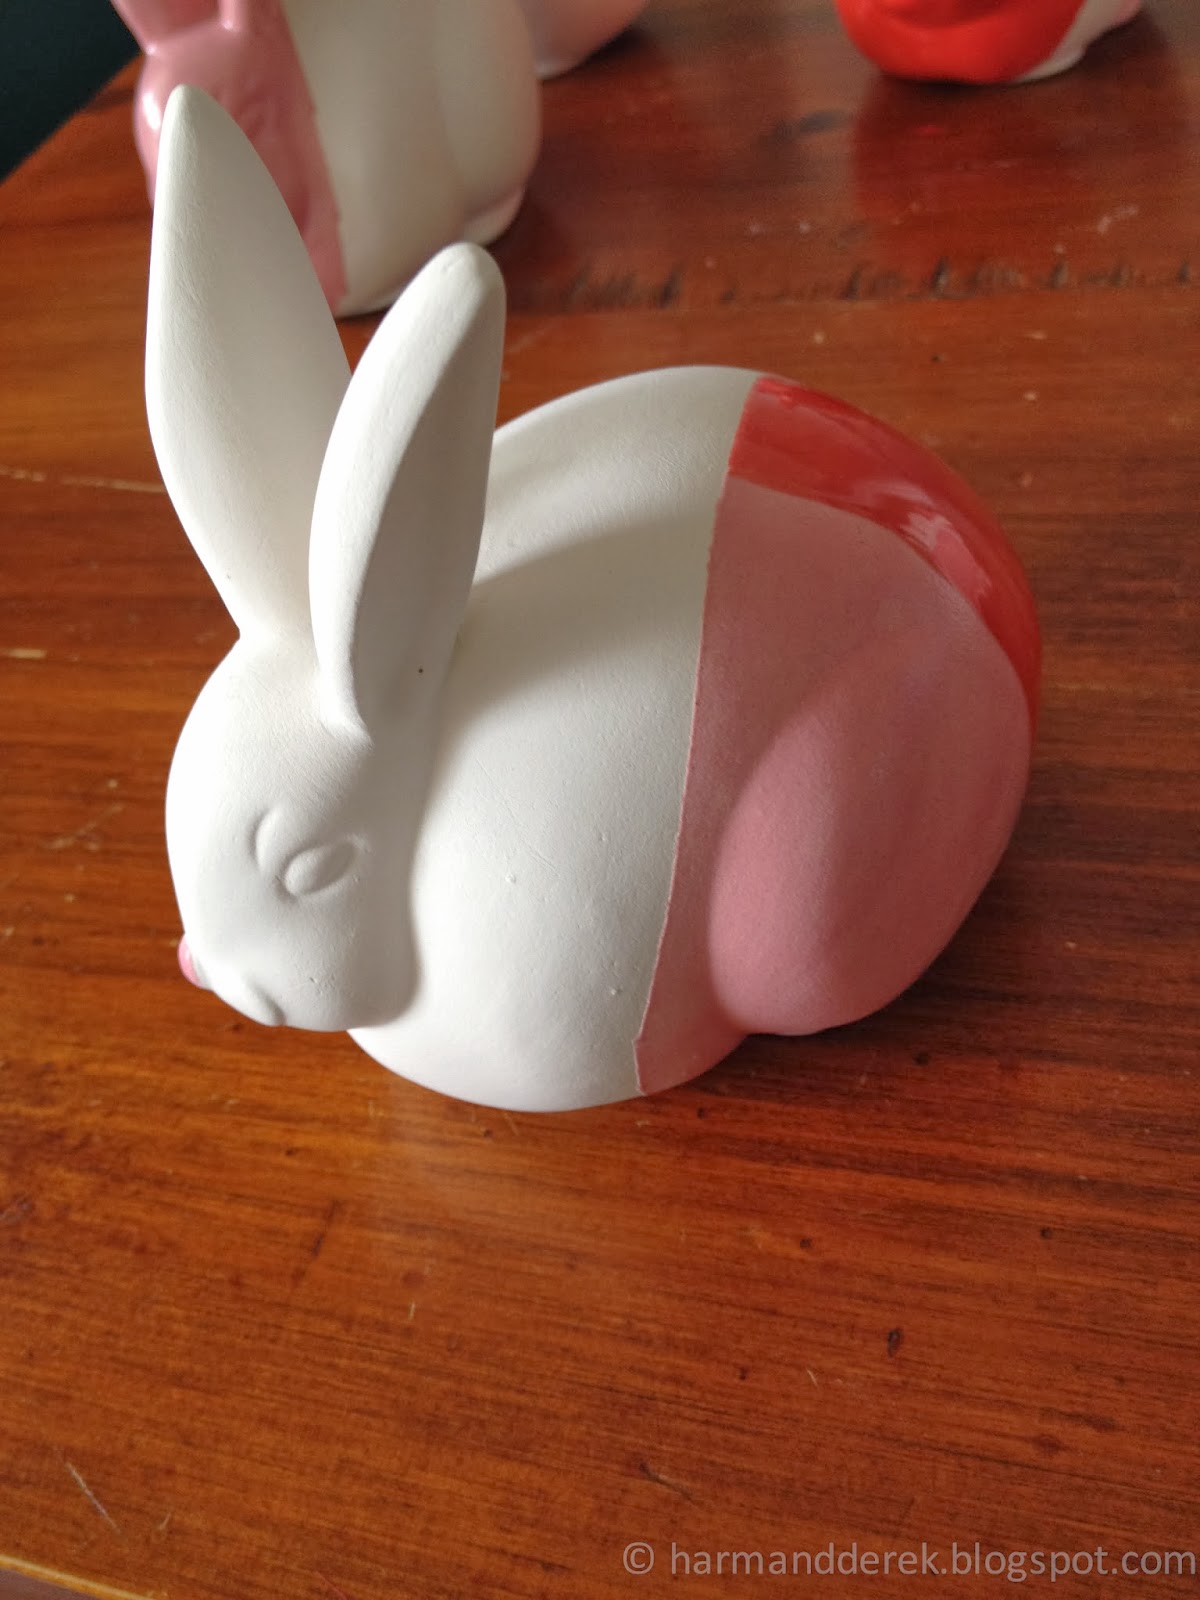
Cute little bunnies are ready for Easter.  They hold cotton inside and then can hold your rings! 


Sep 14, 2013

the land of nod

i'm a huge fan of the land of nod.  i get the magazine and look through it over and over again.  mainly to get ideas but always wishing.  they other day a woman with @thelandofnod e-mail bought a pair of my planter heads.  i wrote her briefly telling her order was on the way and that i loved the land of nod.


then i got this.  

These are for our lobby - they're awesome! You should design product for us, your work is amazing. I could totally see it translating to lighting or something. let me know if your interested, (I'm the CEO).
Michelle


i was baffled and still am. you can imagine it took me a while to figure out what to write back.  one day...maybe we'll see our planter heads in their magazine.


in the meantime, i gave my little lady a new hairdo.  she's going to look oh-so-festive in my fabulous newly remade half kitchen. 

Jul 12, 2013

how to travel with your baby part dos


"Can I just say how refreshing it is that you don't have a giant stroller?" says my favorite barista Alicia.  See, I have this little umbrella stroller that I bought at the Walmart for fifteen bucks.  Mainly because it was neon green and had an eye on it.  Not to say, that I don't greatly covet the fabulous Bugaboo Strollers.  (Go big or go home right?!)  I've even tried to convince my husband that we should purchase one.  

Silly me. 

For as much as I am "hoarder" I am also a big minimalist when it comes to baby stuff.  Especially when travelling with my baby girl.  I'd like to tell you about my latest travels with the lovely Aiko.  Which, in all reality went so WELL!  After my slight fall apart on the last flight (here) I was determined to make the next four a happy memory.  I contribute it to these lovely guardian angels. 


My Nameless Guardian Angel, who was also traveling with her father.  She held Aiko the ENTIRE flight from Denver to Iowa.  She played with Aiko and got her to sleep.  I never even asked her name. 


Lynn, who fed, held and watched Aiko, while I tried to figure out what we were going to do, since they just canceled our flight out of Cedar Rapids. 


Leslee, who was there to let us go ahead of her in line even thought we all had been waiting an hour anyway.  She helped carry bags, and kept a positive attitude when the airline decided to put everyone in a hotel.  She walked with me through the shady streets to find some baby food.  It was so nice to eat dinner with someone who felt like home.


Last, but not least, my little sister Hannah.  She really does a lot for us and luckily, she came to Iowa with us!  Aiko just loves her Auntie. I often wonder when Hannah will just throw in the towel and say "No, I don't want to change that adorable baby's diaper anymore!"

All these ladies made traveling so much easier and pleasant in fact.

So what have I learned on these last four flights?

1. Keep a positive attitude, no matter what.  Babies can feel your stress.  So, my flight back got canceled.  I had just turned in my rental car, driven 2.5 hours to get to the airport, packed just enough food for my baby for the flight home and I just decided to check in my bag with all my extra stuff.  Now, they were trying to get everyone onto different flights.  My wouldn't leave until the next day.  It was kind of overwhelming. Lucky for me, my lovely angels above were watching out for us.
2.  Don't be afraid to let people help.  I'm not usually one to just let complete strangers hold my baby, watch my bags (at the airport nonetheless) and then feed my baby, but for some reason I did.   Those lovely ladies touched my life and I hope to pay it forward someday. It also kept Aiko happy.


3.   Keep your baby's belly full!  Always pack extras.  This makes it a little harder for me as I make all her food from scratch. I've found that if you just put all the food in bottles ahead of time and then add a little water it's SO much easier.  She doesn't need to be spoon fed all the time.  Also, the airports let you take as much food as you want...at least I got 4 bottles full of food plus my extra in containers.  They'll just check it all one by one.   I also recently decided that it is worth it to buy these...even though they are ridiculously expensive they are ever so practical while traveling.

 
(See how the nipple is orange? Peaches, Sweet potatoes...all have been through that puppy)

4.  Be sure to get there somewhat early.  Sometimes, you have to make 20 bathroom runs.  Baby pooped?  Oh, now you need to pee?  Or they will have to check each bottle of baby food you brought.  Or you will have to wait 10 minutes while they let everyone behind you go before they check your baby food one by one. 

5.  Pack it light.  I am a pilot's daughter.  Not only do we have strict military like table manners we also learned to pack like a commercial pilot.  You don't put your elbows on the table and you must always chew with your mouth closed.   You MUST roll your clothes in tight rolls and stuff your underwear in your shoes.  (Or in my case, my bras, you can't put much in size 5 shoes.)  For the week I was gone I had my cow bag (which is a duffel bag with wheels), diaper bag and Aiko's car seat.  I'm not as organized as my dad, nor can I pack it in like him.  

Here's what I packed in my cow bag.
5 outfits for myself and baby (we visit laundromats)
underwear
1 pair of shoes (I try to take shoes that don't need socks)
extra baby food making items (I make her formula out of chia seeds, millet and dates so they are dry ingredients)
extra diapers and wipes (I always buy more at our destination)
jewelry
phone charger
essential oils
bathroom items (we have a bag that's filled with all the necessary items in the appropriate TSA approved sizes)
an obscene amount of tampons (she always visits when I travel)

(wearing the Moby) 

We were gone for 7 days (8 if you count the extra surprise hotel stay) and you may be wearing the same outfit twice...but who cares.  Your baby isn't going to care either.  We seem to have a ton of pictures of Aiko wearing this same giraffe print. Although she seems to care that we are matchy-matchy.


6.  Traveling isn't a fashion show.  Yeah, so I don't always look the cutest when actually traveling (like in the air), that's because, I am traveling with a baby, by myself.  

(I'm wearing the cover-up that basically looks like a shawl and is Aiko's blanket)

So I wear practical shoes, that are easy to take on and off.  Simple shirts that I can nurse in, and pants that I know are comfy. Plus, I carry Aiko in the Moby everywhere.  You'd think people had never seen a baby before.  I got so many comments...probably because Aiko's little round face just sits out bouncing along.  Like here. I need to keep my hands free and I don't have hips big enough for her to sit on.
 
7.  Make a list of items you need to take.  I usually make mine a couple days before I leave and start packing.  Why? Well, because I like to pack early and then if I forget something I at least have a couple days to think about it and whether or not I really need it.   I'm not really an organized person, truly, that's why I have to start early.  You better believe everything in my list was just thrown in.

 (via Etsy here)

Here's a list of things I took in the diaper bag:
Moby Wrap (well I wore this all the time so we don't take a stroller)
Cover-up/Shawl, which also doubles as her blanket (I also wore this much of the time)
4 Bottles packed with Food.
Extra food
Diapers, Wipes, Changing Pad
Kleenex
Extra Outfit for baby
Phone
Lavender and Frankincense Essential Oils 
(calming and protective oil)
Book for me
2 Baby Toys
Wallet

Now, I'm not pro at this whole baby thing, but I do feel somewhat confident now that I've flown with her.  I'm sure when we have another baby everything I thought I knew will all be garbage anyway.

(Finally home and yes, still wearing that moby)

Apr 20, 2013

baby room part dos


ya know, it's true, i never knew how much love can go to a little baby.  every time she smiles, she about melts my heart. i haven't used the word "adorable" more times than these last couple months in my whole life. 


this blanket is also adorable friends.  my friend holli made it, hand picked all the material and hand quilted all of it.  how does someone know someone else so well?  i love this and for some reason this sun totally makes me think of aiko. corny i know, but i'm a mama people.


this pup i made.  
my grandma phyllis was an avid crocheter and had a subscription to some magazine.  guess who she bequeathed them too?


this little hippo was thrifted from japan's finest thrift shops.


this game is very hard....i can't remember what its called, but it also traveled from japan.


and this.


this heater plays an important part in our lives.  especially in picking it out.  with his new baby, the husband scoured over websites, comparing, researching which would be the best deal and most efficient. ;)


sweet sister hannah and the mama made this. seen on one of my pinterest boards. (sigh, you know how you pin things and then can't find them AGAIN?!?!)


thrifted


bought from etsy, i'm not even going to tell you how much i spent.  for some reason the knitted look is so much cuter than the crocheted and since i can't knit...


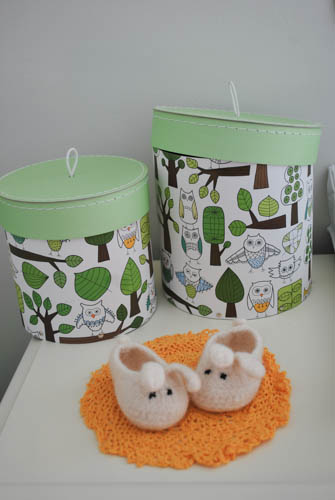
ikea pails from grandma walker. use them to hide all her bathroom stuff. the cute little bunny slippers i bought on a whim (i should have crocheted them but see, when you are 9 months pregnant you don't want to do anything) the doily i did crochet myself...and it was the first and last one i'll probably ever do.

ShareThis